With the development of digital post-production, some of the filters used in the past (e.g. for color modification) are no longer needed. With a few steps, using software such as Photoshop, we can achieve the same result and avoid carrying weight in excess.
The same is not true for the polarizing filter, an indispensable accessory in travel photography, because, if well used, it corrects a property of the light that cannot be modified during the retouching phase: the “Polarization“.
What is polarized light?
White light, emitted from natural and artificial sources, such as the sun or a light bulb, is not polarized, it propagates in all directions, without precise organization in space.
It becomes polarized when it is reflected from the surface of some subjects/objects, thus changing its characteristics.
How does the polarizing filter work? In what situations should it be used?
The polarizer is a bit more complex than the filters that are generally used in photography. It consists of two crystals, one of which moves over the other with a rotating motion to absorb one of the incident wavelengths.
We will have to decide how to move the polarizing ring based on what we see in the viewfinder. Bearing in mind that, with the sun in front (against the light) or behind us, it will not produce any effect. The ideal is to keep the light source at a right angle (90 degrees) to the camera, sideways, at the point of maximum polarization. The smaller this angle is, the less the effect will be.
The main effects that we can achieve with the filter are:
1. Reduction of reflections on crystals, water, plastic, wood, and painted metals. We could use it, for example, to remove a reflection from a glass or attenuate it, thus making the water transparent;
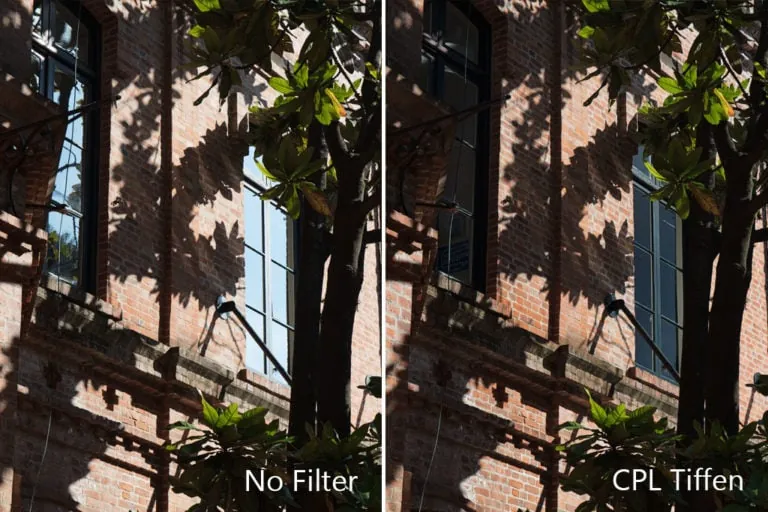
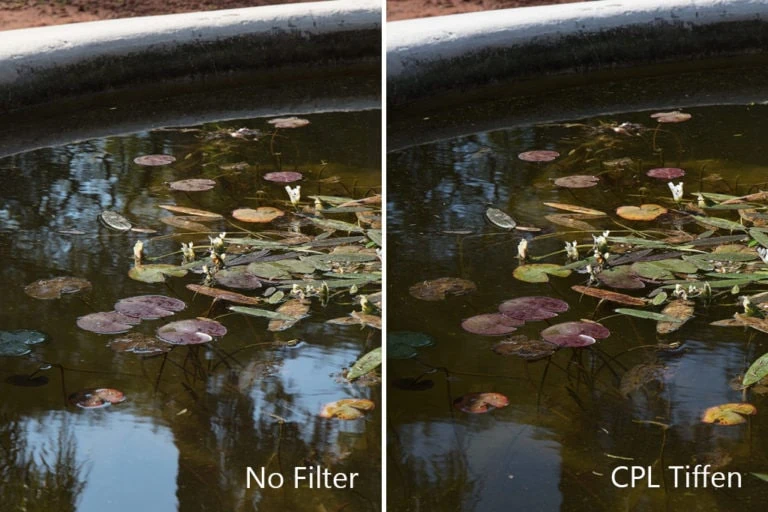
2. Increased contrast in the image;
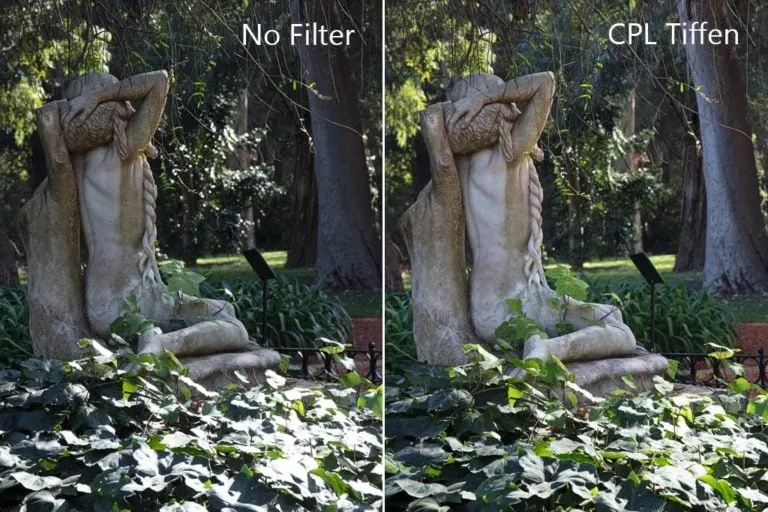
3. Color saturation, especially useful in landscape photography. For example, we could give more liveliness to the colors of the sky and the foliage, with more contrasting clouds.
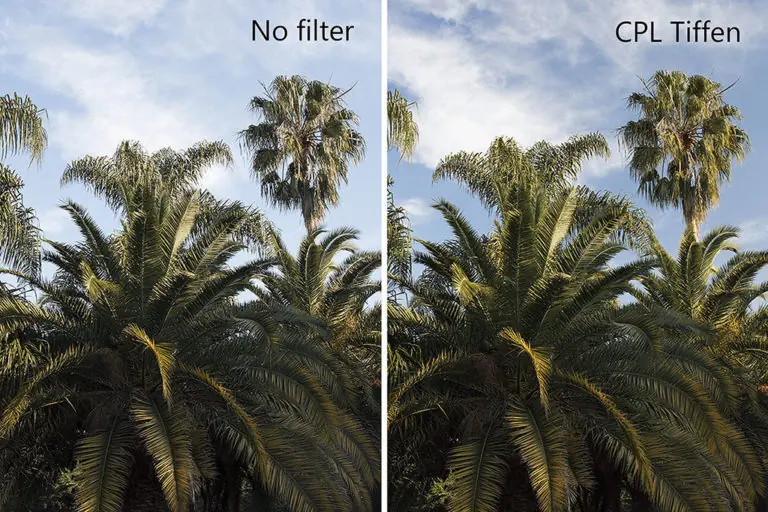
For this reason, it is used especially when the sun is high in the sky and the colors are not very saturated, with marked reflections.
A disadvantage of the filter is that it removes brightness from the scene. We will have to adjust the values to achieve a correct exposure and, in case of low light, use a tripod.
There are 3 aspects to which you will have to pay particular attention:
1. In a scene with a lot of difference between lights and shadows the filter will increase the contrast even more;
2. Vignetting, already present in many wide-angle lenses, will increase using the filter;
3. The effect of polarization depends on the incidence of light, which may not be the same in the totality of the image, especially in the case of a short focal length, on a very large frame. This can lead to results that are not always pleasant, such as parts of the sky that are darker than others.
What types of polarizing filters are there? Which one should I take on a trip?
On the market, we find screw and plate polarizing filters (among the most known brands Lee and Cokin).
When I travel I prefer to take a circular screw polarizer with me. It takes up less space and you don’t need an adapter like the plate filters, it applies directly to the lens thread. That’s why it’s important to know the diameter of the lens on which we want to fit it before buying it.
Less weight and space, more freedom on the move!
Tip:
Buy a quality filter, considering that, if you have invested in a camera body and expensive optics, it makes no sense to place a cheap glass in front of the lens, which could compromise the final result of the image. In general, the price of these filters ranges from 25 to 160 USD.
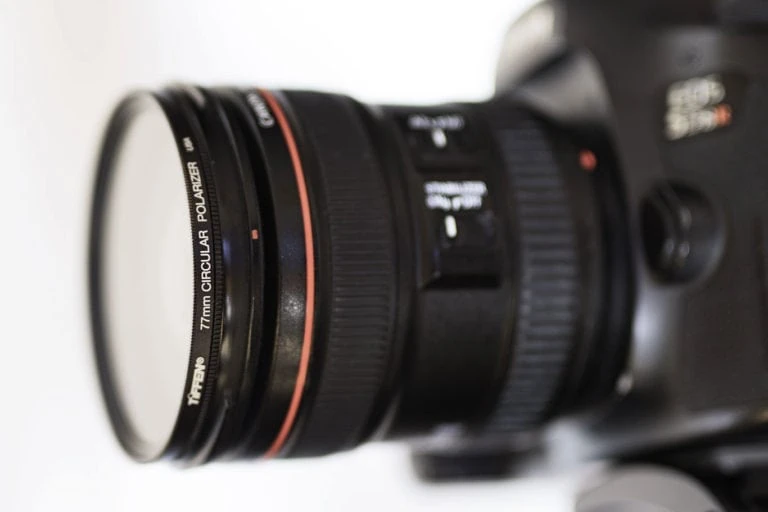
For the tests carried out in this article, I used a CPL (Circular Polarizer) Tiffen 77mm, kindly provided by the team of Digital Zoom. A well-built accessory, with a fluid ring and an excellent value for money.
Other brands to consider are Hoya, B+W, and Kenko.
Conclusion:
A good polarizing filter should not be missing from your travel photography photo kit. Once you have chosen which is right for you, practice with different lighting situations to consolidate the theory and understand how to make the most of it.
I hope that the article has been useful if you still have any doubts about it you can write to me in the comments below. If you’re interested in learning about travel photography, check out this guide about How to Become a Travel Photographer.

