
Want to learn how to blur the background of your images?
In a portrait, it could be fundamental to focus attention on the subject and isolate it from an uninteresting scenario.

To achieve this effect you will need to master the depth of field, the area of the image that our eyes appreciate as sharp, in front of and behind the focal plane.
What are the factors that influence the depth of field?
1. The Aperture of the Diaphragm;
2. The Focal Lenght of the lens;
3. The distance between the camera and the plane of focus (PoF).
Let’s start with the first one, looking at the image below.
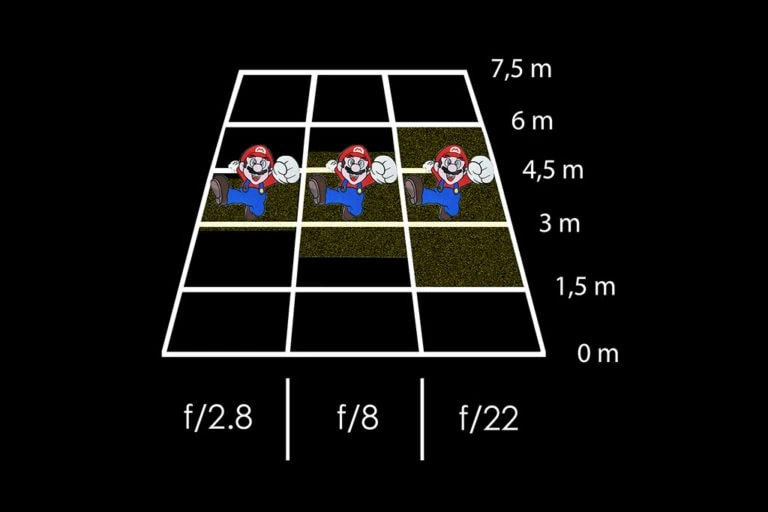
The graph shows how, keeping the same distance between the camera and Mario (4.5 m), the same focal length in the lens (e.g. 70 mm) and different apertures (f2.8 – f8 – f22), we will get different results in depth of field.
At larger aperture (f2.8), lower DoF.
At lower aperture (f22), higher DoF.
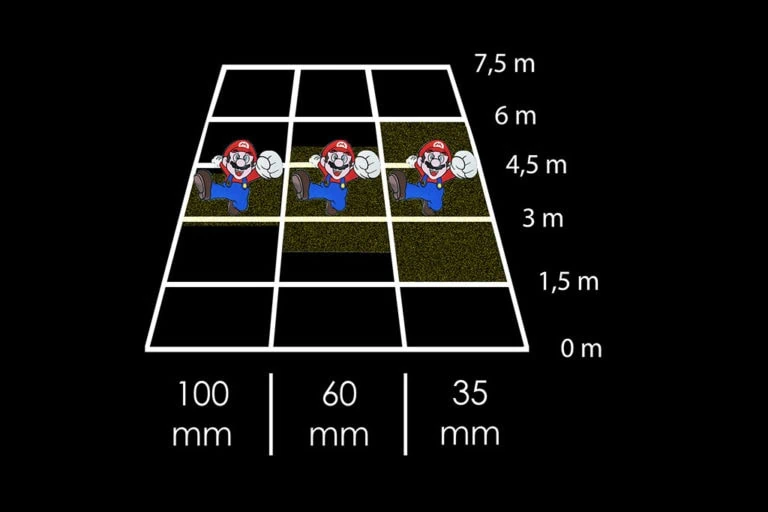
In this case, the distance between the camera and Mario is the same (4.5 m), even the aperture is equal (f8), the only variable is the focal length of our lens (35mm – 60mm – 100mm).
At greater focal length (100mm), smaller DoF.
At smaller focal length (35mm), greater DoF.
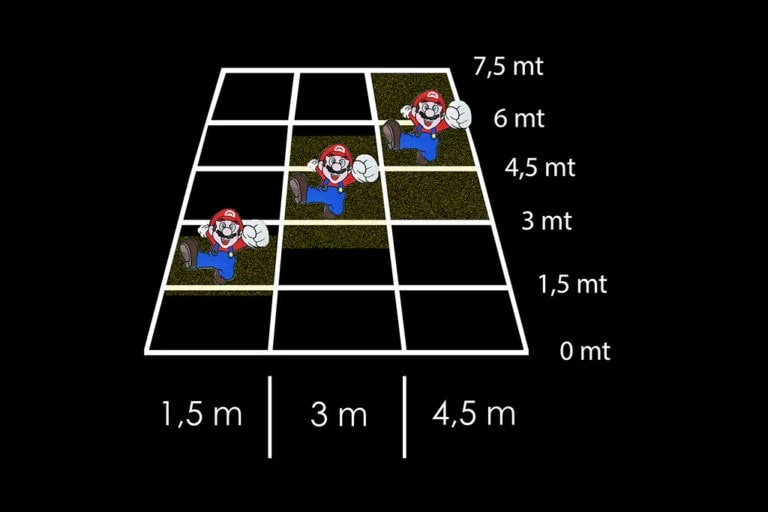
In this last graph, we hypothesize to maintain a same focal length (80mm) and aperture (f5.6), the only variable is the distance between the camera and Mario (1.5 – 3 – 4.5 m).
At a greater distance between us and the subject (4.5m), greater DoF.
At less distance (1.5m), lesser DoF.
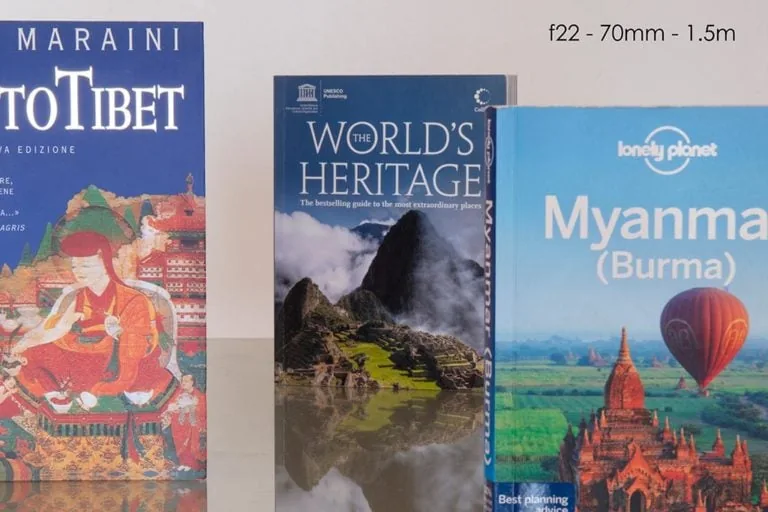
Below are some examples done maintaining the same distance (1.5 m) to the plane of focus, the same focal length of the lens (70mm) and different apertures (f4 – f8 – f22). I kept my focus on the intermediate element (Secret Tibet, the book on the left of the frame, a masterpiece by Fosco Maraini that I suggest you read) and then made equal cropping in the 3 images to highlight the differences in depth of field.
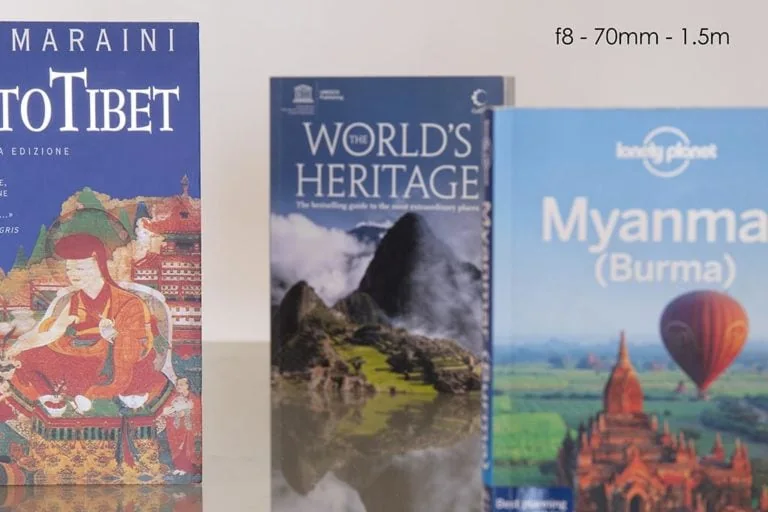
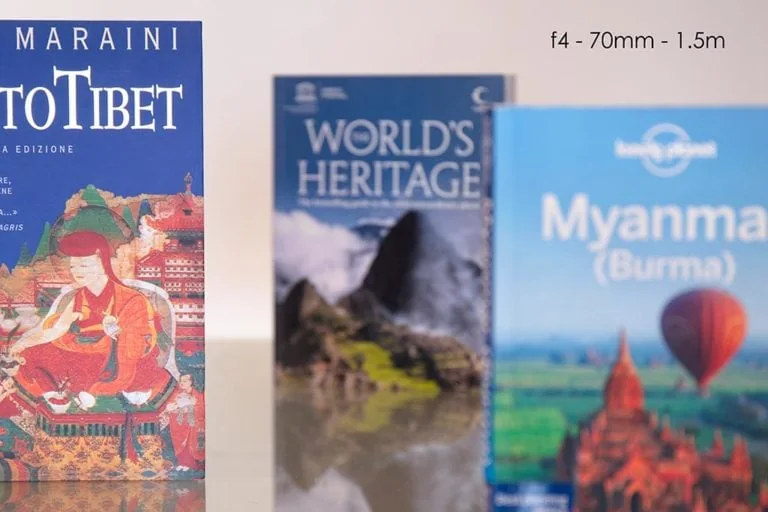
The DoF in your image will vary depending on the combination of the 3 elements described above. With a telephoto lens, it will be easier to get the blurred effect, the opposite of a wide-angle.
How do I apply the depth of field to my photographs?
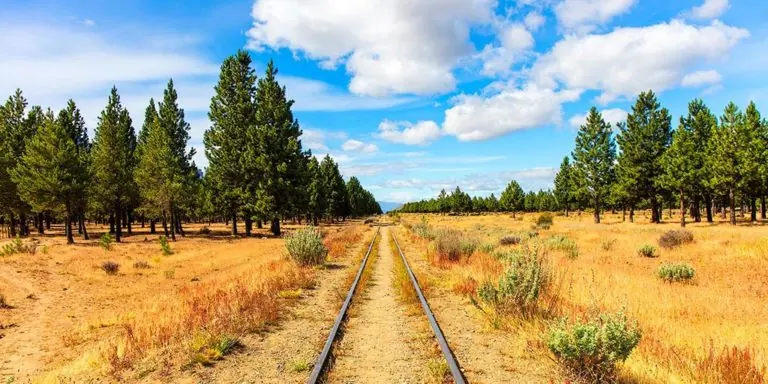
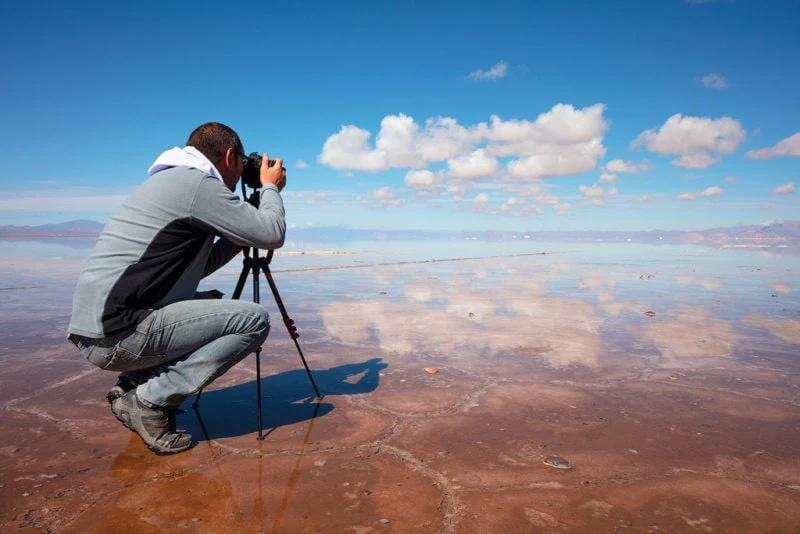
In a landscape, you will almost certainly want to get the maximum detail in the image. You should, therefore, use a tripod, so that you can set a lower shutter speed value and a closed aperture in order to increase the depth of field.
In a portrait or detail, it might be ideal to blur the background to draw attention to the main element of our image. We will achieve this with a wide aperture and the combination with at least one of the other two factors (wide focal length of the lens or short distance between the camera and the plane of focus).
![]()
Exercises:
Use a tripod, place 3 objects (at the same distance from each other) on a board and do different tests with a zoom lens to observe how the depth of field change:
1. Maintain the same focal length of the lens and the same distance to the plane of focus, with three different apertures.
2. Keep the same aperture and distance to the plane of focus, with three different focal lengths.
3. Keep the same aperture and focal length, varying, in this case, the distance to the plane of focus, i.e. moving the tripod.
Important: keep the objects in the same positions, as well as the tripod, which you will only move in the last test. Always place the focus point on the same object.
I hope that the explanation has been clear and that the examples and exercises given will help you to consolidate this concept. The Depth of Field is a fundamental aspect of photography, both technically and creatively. If you still have any doubts about this, you can write to me in the comments below.


2 thoughts on “The complete guide to the Depth of Field (DoF), with examples and practical exercises”
We are a family run dive centre in Cyprus, we love your content.
Thanks!! I really appreciate your feedback, it helps me to continue in the same direction and with the same passion. Regards from Buenos Aires!